Sunday, December 21, 2014

DIY Christmas Gifts

It’s almost here!  Christmas is just 4 days away!!  I  am looking forward to some down time with the family. 
Today I am sharing with you a few DIY gifts I’ve given this season.
The first gift is wine.  This makes a great hostess gift for all those parties this time of year.  I put these together for some of my customers.
Wine Wrapping
Obviously, I didn’t make the wine…LOL.  The wrapping here was easy.   I simply cut scrapbook paper to wrap the bottle securing with washi tape to the back.  I cut the tag out of the same paper.  The hole was punched with a 2” hole punch.  Super easy and you have a nice tag to write a message on.
The second gift is another that I put together for a few of my customers.  I love nail polish and often times I am complimented on my nail polish colors and thought this would be perfect gift.
Mistle Toes 2 
This was an idea I got from Pinterest.  The original source is from Ivy in the Bay.  That is where you can find the free printable tag. 
A few tips:
Print the tag on cardstock. Use the non-plastic snow if you can find it because otherwise it clings to the bag.  Also, using a piece of cardstock in the bottom of the bag with a dot of hot glue, this helps the polish and lotion stand up straight.
The third gift was my favorite!  I made Body Butter, Body Scrub, and Face Scrub.  These are all natural and organic and I had fun learning about what oils to use to make these. 
This was another idea I found on Pinterest.  The original pin was from the website  Lia Griffith, Handcraft Your Home.  Happy to report this was a very successful Pinterest find.   The free printable labels were great and the instructions to make the lotions were superb and easy to understand.  I encourage you to check out the original source here if you wish to give them a try. 
I was pretty much sold when I saw them packaged in Weck Jars which are my favorite. 
Lotions
I wrapped these a few different ways.  The first in a small basket with tissue paper. Lotions wrapping basket
The small face scrubs with a ribbon and decorative tag.
face scrubs
The body butter and body scrub stacked with a ribbon and tag tied around them.
Body Scrub
I can’t say that any of these DIY gifts are great money savers but it was nice to make and put a handmade touch on them all. 
Please be sure to visit the original sources.
Have you guys been making any gifts this year?  I’d love to see them if you want to share them with me on Facebook.

April

Sunday, December 7, 2014

DIY Glitter Garland

Hey Guys!  Hope you are all having a good weekend!  We have been pretty lazy over here and we are soaking it up before the Christmas madness begins.  Today I am sharing with  you my Merry Christmas glitter garland.
Merry Christmas Glitter Garland

Sunday, November 30, 2014

Hometalk

Hey Guys!  Hope you all had a nice relaxing weekend.  I know not everyone is off work over the Thanksgiving Holiday, bless all of you in retail.  I was remembering this weekend when I used to work at Belk and how crazy Black Friday was, pretty sure that is why I am not a fan. 

Tonight I wanted to share with you a fantastic resource for DIY Home and Garden Ideas, Hometalk.  

Hometalk contacted me about curating a Vintage Sign  board after seeing my Vintage Bick’s Pickles Sign.  I was happy to help because I love Hometalk!  If you are not familiar basically Hometalk is website dedicated to home and garden projects.  It is a lot like Pinterest in that you can clip your favorite projects to boards to save them, that is just what I did with the vintage signs I loved.

heartsdesiresathome2711 (2)

These signs are so cute and creative! I think my favorite is repurposing the church attendance sign but I also love the Mistletoe and Farmers Market signs.  You can find all of these on Hometalk  on my clipped vintage sign board!  Click the picture above or this LINK.

There is so much inspiration to be found on Hometalk and the best thing is you can ask questions to those that post their projects.  So unlike Pinterest, where you often find a dead link to the original source, with Hometalk you can ask the original poster. 

Also if you are a blogger it is a great resource to share your projects.

So go check it out and let me know what you think!!

Have a great week everyone!


April

Thursday, November 27, 2014

Christmas Cotton Wreaths

Hi guys!  I hope you all had a wonderful Thanksgiving!  I bet most of you are burning off all those calories with some Black Friday shopping!  Not me, I will be avoiding those crowds! 
Today I am sharing with you my second craft in the Countdown to Christmas Craft Series, my Christmas Cotton Wreaths.  I love to add natural elements into my décor when possible and cotton is just so pretty.  I remember my Mom used to have this beautiful cotton wreath in our kitchen, it was there for the longest time and brings back good memories.  I personally love using cotton in my Christmas décor so I wanted to incorporate it into some wreaths that I could use inside.
Cotton Wreath
This project was another easy one that really didn’t take much time.  You will need a few supplies, grapevine wreaths, cotton, floral berries and greenery stems.  You may also want hot glue and small garden clippers to trim up the wreaths and shape them a bit better.

Sunday, November 23, 2014

Christmas Tree Terrarium

Hey guys!  Today I share with you the  first project in my Christmas Craft Series, my Christmas Terrariums.  These are super easy to make and you are going to want one!
Christmas Forest
This is a simple and easy craft that takes little time, you just need a few supplies. 
Ingredients

Sunday, November 16, 2014

Countdown to Christmas with Crafts!!!

Christmas Crafts
I hope you will join me!  I have been busy crafting away this week and I’ve worked on some really fun projects that I will be showing you here on the blog. 
Posting Schedule
November 23rd- Christmas Tree Terrarium
November 28th – Christmas Cotton Wreaths
December 7th – Glittery Garland
December 21 – DIY Gifts
Look forward to showing you these neat ideas!!

April

Tuesday, November 11, 2014

80th Birthday Celebration

My Grandma, or as I call her, my Mema celebrates her 80th Birthday today!
Mema
This past weekend we celebrated her with a big family party.  We decorated with owl’s because she is a wise old owl!  But really how can this lady be 80!?!  She has a lot of energy for 80, always busy with something. 
She is truly an amazing woman and she has helped shape my life in so many wonderful ways.  She has taught me many things in my life,  most importantly to my husband she taught me to cook!  We share many things in common, our love for cooking, cleaning, and decorating! 
Her party was so fun!  She had many of her family and friends there to celebrate her and she enjoyed the company. 

Thursday, October 30, 2014

Trick or Treat

I hope you all have a great Halloween!  We had a great time at our party last weekend.
Group Picture
Bet all my friends didn’t know I’d put them on my blog, LOL.  For several years in a row we have hosted a Dead Celebrity party for Halloween.  With all the moving we did a few years ago we stopped for a while but this year was great time to host again.  It is always fun to see what everyone comes dressed as.  We had several repeats this year which was funny!

Thursday, October 16, 2014

Floral Arrangements

My friend Renee over at The Refined Relic wrote the best post yesterday in her Why I Love it Wednesdays Series on Foraging for Florals.  I was inspired.  I walk around our neighborhood everyday and as you know we developed this neighborhood and it is currently only half built so there’s lots of raw land.  This Fall I have really enjoyed seeing new things bloom, lots of yellow, reds, purples and white.  Also, I noticed over the Summer we have a rash of ferns growing in one spot, they are now turning a nice Autumn color.  Anyway, Renee’s post really spoke to me…why not pick some of these beauty’s and enjoy. 
Today I did!  I stopped by Trader Joes for almond milk and was pleasantly surprised that they had their pumpkin trees back.  That was enough to decide today was the day to pick some weeds.  I love these pumpkin trees, such oddities!  They are awkward and hard to arrange but with my added “weeds” they look awesome.
pumpkin tree
I added a few  ferns and some tall grass that looks like fireworks!  It was just the right accent for the funky pumpkin tree.

Monday, October 13, 2014

Halloween Decorating

You all know I love Halloween and I go a bit overboard with the décor!  I wanted to share a few pictures of the inside of the house all decked out in black and orange.
Our living room mantle looks very similar to last year but I just love that bunting.  I try not to go crazy in the living room since I have so much color in there already.  I enjoyed having an extra cabinet to work with this year, it was fun to fill.
Halloween Mantle
Living Room Cabinet
I picked up this “31” at Homegoods this season and was super excited to have a new Halloween picture.  I had fun spray painting dried hydrangeas for a eerie look. 
Black Hydranea
The other area of the house that I added Halloween décor to is the dining room.  I have so much fun seasonally decorating my china cabinet.

Saturday, October 4, 2014

Fall Porch

Hey Guys!  I have been having so much fun decorating for Fall this year.  Most of my Fall decorating leans towards Halloween because I just love it!  I wanted to share my porch with you guys today. 
Porch Up close
These photos are a little shady if you know what I mean…We get so much afternoon light on the front of the house.

Sunday, September 7, 2014

Neighborhood Update

It’s been some time since I last gave you guys an update on how things are selling in the neighborhood we developed.  Thankfully the sells have continued to stay steady and we have sold almost 50% of the lots to date. 
Glen Iris Update
Looking back, we started building the first house in Fall of 2011.  We moved in that house in July 2012 and it sold a month later.  We moved in with Will’s parents for a few month while we built the house we are in now. We moved here January 2013.  At that point in time, including those two homes, we had sold 4 lots. 
Things really started to pick up in Spring of 2013.  Fast forward to today, Summer 2014, we have sold 19 lots.  Five are currently under construction.  We are happy to have great neighbors and feel a sense of community again. 
We have finished all major construction to the land and all lots are sellable.  
We are hoping lots continue to sell soon!

April

Wednesday, September 3, 2014

Design Dilemma {Living Room}

A sweet reader, Heather,  recently emailed me and asked if I could give her some suggestions and advice on decorating her living room.  She had recently sold a large entertainment center in the space and it was feeling empty. She also had trouble arranging the furniture in the room because of the doorways and general layout.  This living room is a great space that connects to the foyer and the kitchen on the opposite ends of the room.  There is also a door that leads out to the back deck. 

A common complaint in rooms is an awkward layout.  In new construction, builders work to make spaces feel more open so I hear this complaint often.  It’s all about finding the right fit for comfort and something that is visually pleasing when you enter the room from all angles.  Finding that layout can drive you nuts and sometime you just have to move furniture around and live with it for a few days to get the feel for it.  Heather has great taste in colors, fabrics, and accessories just by looking at the rest of her home. 

I had her send me a few pictures of the space so I could get an idea of what she was working with.  She mentioned in her email that she was planning to purchase a new console for the TV  and she was considering a new couch, possibly a sectional.

Sunday, August 31, 2014

House Tour

We’ve been in our current home almost 2 years now, it’s time I share the whole space with you.  You’ve seen a lot of decorating along the way but here is a snapshot of the whole house. 
Welcome
Front Porch
When you enter our front door you’re standing right in between the living room and kitchen and just beyond that is the dining space.

Thursday, August 28, 2014

Backyard Garden Tour

As Summer slowly slips away I thought I’d share my backyard plants from this season.  I have enjoyed our yard tremendously this year.  Last year was our first Summer in this house and we added a few flower beds and planted flowering shrubs and trees.  This year we expanded those beds and I planted more.  We’ve been lucky that it hasn’t been an extremely hot Summer and we’ve also had plenty of rain so everything has flourished.
IMG_4886

Sunday, August 24, 2014

Tour Through Blogland

Happy Sunday Everyone!  My friend Renee over at The Refined Relic ask me to take part in a Tour Through Blogland which is a group of bloggers posting about their home & blog so that other readers can get to know them better.  Please be sure to check out Renee’s tour HERE.
I was actually scheduled to post on Monday but I am traveling for work so I decided to get this going today.
with plants
Here at A Heart’s Desire I blog about decorating, my crafty adventures, furniture refinishing, gardening and occasionally something yummy I’ve baked.  I enjoy the process of making a house a home and putting my stamp on our home.  I enjoy my home, inside and out and pour a lot of love into it.  I hope that is something my readers pick up on when they read my adventures.
From Above
Over the past few years and soon after starting this blog, me and my husband Will have moved a few times and it has given me the opportunity to decorate a few homes and find ways to use my belongings in different ways.  Many years ago we bought land to develop into a neighborhood and we have been working on selling lots to builders, but with the ups and downs of the economy it has taken some time to do this.  We have built two homes in the neighborhood  and lived in both, leaving behind our first home.  We are now living in the second home that we built in the neighborhood.  It is a small farmhouse style that really fits our current needs.  This process has taught me to live on a decorating budget, so I have become quite the thrift shopper. 

Sunday, August 10, 2014

Church Plates, a New Collection

Hey Guys!  Hope everyone is having a great weekend, mine has been pretty awesome since I just got back from vacation!  Ahhhh, relaxation at it’s best! Back to the real world and work tomorrow though.
I did have time to squeeze in a little project that has been hanging around for sometime.  I have been collecting commemorative church plates since the Fall and finally have enough to hang. 
I started seeing these church plates when I was out antiquing and I decided the next ones I found I would start a collection, then of course I could not find any!  My sister in law found the first two for me and then everywhere I went I had to look for them.  I tried to find mostly plates from NC and had pretty good luck with that but have some others mixed in as well.  I wanted to hang these in one area to group them all together.
Church Plates

Monday, July 14, 2014

Coffee Table

I can’t believe I have never had my own coffee table before as an adult.  I’ve always felt like it’s one of those furniture pieces that’s not really important or necessary.  Even with all my thrift shopping I never found one that I liked enough to even paint. 
I have one now and I love it!  After deciding I did want one and drooling over one for a year or more I concocted a plan and Will made it happen. 
Ikea Hack Coffee Table

Sunday, June 22, 2014

New Painted Dresser & Yard Sale Finds

Hey Guys!  I am winning no awards for blogging lately…I am super busy these days at work and with life and I have just had no time or schedule for much home improvement or craftiness but I have been having some fun!  This is a two punch post because I know time will run short through the week.
Lately around the house I have been enjoying watching my newly planted plants from the Spring grow, I’ve recently scored at an estate sale and yard sales.  Home Improvements have taken a back seat to Summer but I did paint this sweet dresser a few weeks ago. 
Painted Dresser After

Sunday, May 18, 2014

Fan Pendant-How To

IMG_4628
As promised, I’m back with a little how to on this fan light.  It was pretty simple, but did take us a little time to figure out how to attach it all because the fan body itself is pretty heavy.
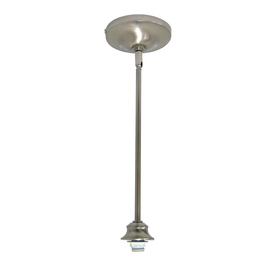
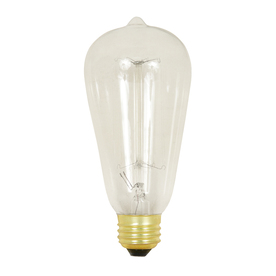
This light cost us less than $30 to make.  We bought a pendant from Lowes and a Edison style bulb like these…

The the biggest obstacle was figuring out how to attach the pendant to the fan box.  Will cut a piece of plywood in a circle with a hole in the center and I painted it white.

Sunday, May 11, 2014

I’m Going to Make a Light Out of It!

IMG_4627
I was visiting my Dad a few weeks ago at the tobacco greenhouse and I saw a pile of fans.  It went like this….
Fan Before
Me: “Hey, what are those fans for?”  Dad: “Oh, those, they are junk…motors broke”  Me:  “What are you going to do with them?”  Dad: “Nothing” Me: “I want the white one” Dad”: “What for?”  Me: “I’m going to make a light out of it” Dad: “You are just like your Mama!”
And the truth of it was…Will was going to make a light out of it!
It was just the kind of junk I’d been hoping for, that piece that sparked instant inspiration and I knew it would make the perfect light.  The one to replace the builder light that was not my style and the last part of the dining room that needed attention.   The piece that makes me proud that  Will is so handy and he can DIY with the best of them!

Sunday, March 16, 2014

Office Makeover

I am going to overwhelm you with pictures today.  I finally finished our home office.  This room has been the one room that I desperately wanted to finish since we moved in and I never really had a plan.  I finally made a list of what I wanted to do and just got to it and finished.
I forgot any before pictures but basically I found file cabinets, a desk chair and painted both.  I  made and hung shades, recovered my bulletin board, hung a filing system, hide cords and painted walls.  It only took me a year to do it! 
Office Now
Room View (2)
Room View
File Cabinet
Terrarium
Bulletin Board
Nipper Picture
Chair
The file cabinets and chair are both painted in Annie Sloan chalk paint, pure white.  The walls are Benjamin Moore Ashley Grey.  The picture of my cat is a print out from Waterlouge App and the frame is recent from Target, Threshold.  The hanging file system is from Ikea.  The lamp is from Hobby Lobby (last year).
Have a great week everyone!

April

Sunday, March 2, 2014

Mini Blind Roman Shades

Happy Sunday Guys! I am back today to show you my marvelous mini blind roman shades.  Last week I showed you my very easy no sew shades for my workout room HERE and today I am going to show you a glimpse into my finally decorated office!
Office Shades Complete
One of the major things I needed to do in here besides paint was figure out a solution for shades.  We have a dedicated home office because Will and I both use it for work regularly.  The room sits off the back of our house and gets tons of morning light which shines right on the computer screen.  As I mentioned in my post last week our windows are an odd size so custom shades/blinds are the only option but I also wanted color so I got creative.  I searched around on Pinterest for a solution and found a way to make roman shades using cheap mini blinds!
We bought cheap mini blinds from Lowes for less than $5 bucks each in 27” and trimmed them down with the dremmel to 26”.  Once I found my fabric I got to work.  The tutorial I used HERE is excellent!  Simply Mrs. Edwards did a fantastic job and I am grateful I found the “pin”.  Please check it out HERE to see her shades.  Here are the steps from my point of view. 
Materials Needed
Supplies
  • Fabric (I needed 2 yards per window)
  • Muslin fabric
  • Fabri-tac glue
  • Heat n Bond no sew tape (iron on)
  • Tape measure
  • Pencil
  • Cheap mini blinds
  • Iron/Ironing board
Step One:
Cut fabric 2” wider than window in width and 6” longer.  Cut muslin to exact window size. 
**If using a fabric with no repeat, this is much easier.  I had to lay my fabric out and really concentrate on where I cut top/bottom and side to side so that all shades matched.  This step took the most time and I wasted more fabric.
IMG_4310
Step Two:
Lay muslin over fabric leaving 3” on top/bottom and 1” on each side. Then use the iron on tape to iron the edges, I secured the bottom as well.
IMG_4311
IMG_4312
IMG_4315
Step 3:
Roll out the mini blinds and start to disassemble leaving only the parts needed.
IMG_4316
You want to cut the cord that holds the slats, the one that looks like a ladder.  Do not cut the cord that controls the blind.
IMG_4319
Take the weighted bar at the bottom off temporarily.  You simple pop out the little circular plugs at the bottom and untie the cord.  Slide the bar off.
IMG_4320
This allows you to remove the slats.  You want to leave enough slats for the folds in the shade.  I left 7, the weighted bar acts as a fold as well.
IMG_4322
Step 4:
Adhere the fabric to the mini blind.  Here you want to lay out your fabric and mark the sides where you want the slats to go.  I measured for a slat every 7.5” inches.
IMG_4323
Next you lay the mini blind over the fabric and arrange each slate in the center of the marking (I marked both sides of fabric)
IMG_4326
I had to make sure I set my top bar the same for each one because of the fabric pattern.  You want to glue the top on first.  This is where the Fabri-Tac glue comes in to secure the fabric.  You add the glue to the front of the mini blind and flip over and press into fabric. Through this make sure not to get glue on your cord.
IMG_4324
Arrange the slats in the center of the mark and glue the front of each one and press down to secure. (dog hair and all)
IMG_4325
Then you work on the bottom slate, gluing to the front first, flip over to secure. 
IMG_4327
IMG_4328
Tie the string back and slide into bottom and put the plugs back in the weighted bar.  Leave just a little slack in the cord, not to tight, not really loose. The add glue to the bottom and sides to secure.  Cut a small slit in fabric to go around the cord.  Trim excess fabric.
IMG_4329
IMG_4330
IMG_4331
At this point you should let them sit for a while to dry and set up.  I waited about 2 hours and then you just hang them up like you would a regular mini blind.  Mine had the brackets secured to inside of window so I just slid these in. It took a minute to pull them up and get the folds to cooperate the first time but they are pretty easy to operate and they look great!! I am really happy with the way they have turned out. 
Office Shades
Here is a look at the back with them hanging.
Shade Back
This project took me about 6-7 hours to complete for 3 shades.  Right now I have more time than money so it was worth it.  Plus I am pretty proud of them.  As for the cost here is the breakdown.
  • Fabric $76.86
  • Muslin $19.80
  • Mini Blinds $12.43 (for 3)
  • No Sew Tape $4.98 (2 rolls)
  • Total cost: $114.07
Shades

April